Elsie gave to me
a sketch:

Elsie wanted a plying box.
She had never seen a plying box but she saw in her mind what it would do and told me what she wanted. It would a covered box with compartments to hold the separate balls of spun fiber that together are plied into finished yarn. During plying the strands are drawn up through narrow openings in the top. I had seen her do it with upside-down flower pots so I had the mental picture, too.
Elsie made it clear that it didn't need to be fancy. She's really classy like that.
I saw as a great opportunity. I could make something nice for Elsie and I could improve my skills with the sawdust-making tools.
So I committed myself in secret to make the plying box in time for Christmas. I had the wood and the tools. I needed a plan and some time.
And a clue.
I had been sneaking up on a clue for a while, puttering in the garage. I also had taken some pointers from a book and a DVD.

Classic Joints with Power Tools [Thanks Elsie!] by Yeung Chan is a slim book that I go to for clear advice and inspiration on the mechanics of joinery. The jig arrangement I used for the box joints is based on one found in this book.
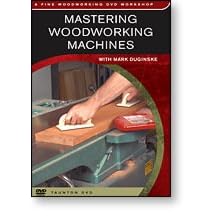
This DVD, borrowed from the library, is incredible. Mark Duginske is God's shop teacher. It is really interesting viewing. Trust me.

To cut the corner joints, I built a jig to pass the wood across the router in a repeatable way, and experimented with scrap lumber until I snuck up a good fit.
It worked!

For several days after, the weather turned bitter and the garage was quiet. I drew up, scratched out, and re-drew a full-scale set of plans. Maybe I had a clue now.
Finally, the day before Christmas, I started early and kept at it all day.
For the wood I had chosen a wide old hard-pine board from a trash heap and a piece of birds-eye maple salvaged from a pallet. I had already jointed and planed these and I had no back-up materials if I goofed.
I cut out the pieces as per my drawings. There was no turning back now!
Then I hunched over my router table with the jig I had built. I carefully milled the teeth of the interlocking corner joints. So far so good. Too much hunching for my joints, but the joints of the box were looking good.
The rest of it I improvised "to plan", which could have been a trainwreck, but I had been experimenting on scrap to get an idea of most of what was needed. A more complete plan would have been better. I'm pretty grateful it turned out OK.
I came inside to warm up and took this picture of the major pieces, before cutting grooves for the dividers:

It came out as I had pictured, or better.
 <- Outside
Inside ->
And on top of it all, it works just as Elsie planned. Hooray for us!

